Today, I will show you a trick that will help you to virtualize easily Mac OS X 10.5 (Leopard) or 10.6 (Snow Leopard) with VMWare Fusion 4.11 (the latest). The MacOS X license does not allow to virtualize the customer versions of the system, even if sometimes the developers ignore it, as with version 4.1 of VMWare Fusion … But as it is perfectly legal to virtualize Mac OS X versions in its dedicated server, it is possible to override the limitation.
So this tip is clearly in opposition to the Mac OS X license : it consists in modifying a classic version of Mac OS X to make the virtualization software believe it is a server version.
First thing to do, find a DVD of Mac OS X 10.5 or 10.6 and make an picture. If it is a grey version provided with a machine, you will first have to modify it so that it could be installed on any Mac. It also works with Tiger, even if it’s more complicated to find a DVD with a x86 system, as Apple never retailed any.
A thing to know is that trying to make a disk image with the disk utility is useless : it will not work. We’ll have to go through a slightly different method. In fact, the disk utility does not copy the EFI partition, which is indispensable here.
The first thing to do, therefore, is to obtain a correct image, using the line command and the Terminal. /dev/disk1 is the name of your optical drive, obtained with the command diskutil list. By default, the image is placed on the desktop.
dd if = /dev/disk1 of=~/Desktop/osx-installer.iso bs=1m
Once the image is on the disk – it can take a long time – you have to convert it into a DMG image with the following command.
hdiutil convert ~/Desktop/osx-installer.iso UDRW -format -o ~/Desktop/osx-install
Once the image is on the Finder, you must type a line command. Your DVD must, of course, be called Mac OS X Install DVD, which is a priori true.
sudo touch "/Volumes/Mac OS X Install DVD/System/Library/CoreServices/ServerVersion.plist"
Then start VMWare Fusion, click on New… -> Without a disk -> Use the disk or disk image to install the operating system. In the menu, just select the disk image previously amended. A selection of the system appears, you have to choose the right system, depending on the OS.
The installation should start.
Warning: at the end of the installation, the system will indicate that it will restart in 30 seconds. So you have 30 seconds to click on the Tool menu and choose Terminal. If you do not do it in 30 seconds, the virtual machine will not be able to reboot and you will have to start over.
Then type a command: it creates the file that will allow VMWare Fusion to believe that the system is a server version. Without this file, the system will not start.
touch "/Volumes/Macintosh HD/System/Library/CoreServices/ServerVersion.plist"
Then just leave the terminal and wait for the system to reboot.
There, you have a virtualized and fully functional Leopard or Snow Leopard version. The only drawback: the system is outdated.
The next step is to install the VMWare tools, to make the virtual machine pleasant. It’s pretty simple I will not explain this point.
Now there is one thing to know: the updates do not like the hack that modifies Mac OS X.
If you want to update the system, you will first have to delete the ServerVersion.plist file, located in /System/Library/CoreServices/. Normally, the password will be required.
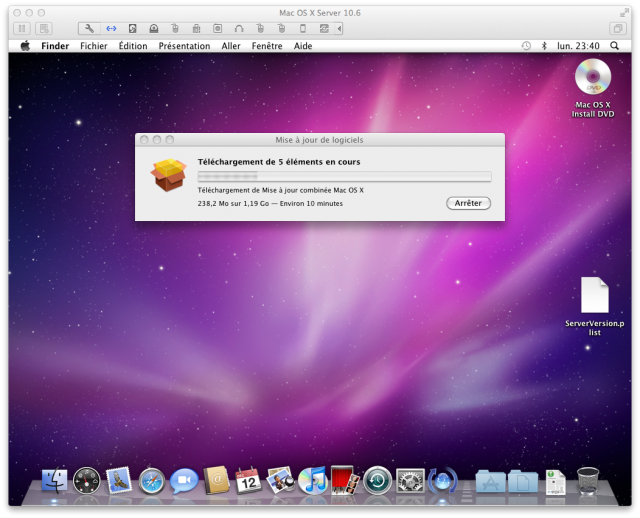
Once it is done, you must update the system, by clicking on the and choosing Software Update…. Wait for the updates do be downloaded, then restart the system when asked. Afterwards, and this is absolutely normal, the virtual machine will not want to start.
We now need the image used to install the system. It must be mounted, as in the early steps.
Then, in VMware Fusion, click on the CD icon and choose as the source the image in question, and be careful to connect the optical drive correctly.
Now it is going to be a little complicated. You must look for the file containing the virtual machine, which is on your hard drive. Once found, you need to right click on the file and choose Show Package Contents. Then you have to look for a file named after the virtual machine and whose extension is .VMX.
Edit this file with TextEdit (for example) and add a line to the end.
bios.forceSetupOnce = "TRUE"
Then close the file and start the virtual machine.
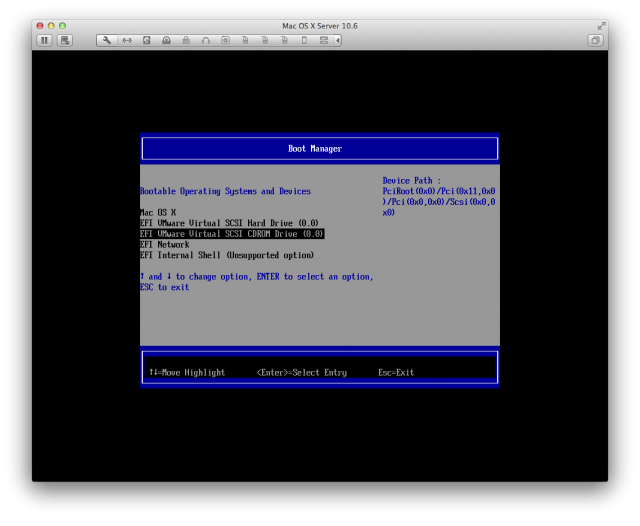
Normally, a menu should appear. Choose Boot Manager and then select EFI VMWare Virtual SCSI CDROM Drive.
The virtual machine will boot from the virtual DVD, and then the language shall be defined. Once done, click on the Tool menu and launch the Terminal. Then type a command.
touch "/Volumes/Macintosh HD/System/Library/CoreServices/ServerVersion.plist"
Once the order is entered, just restart the virtual machine.
If you followed the instructions, the virtual machine should work with an updated system.
The (last) points:
• VMWare does not emulate a GPU, so Quartz Extreme is not enabled, which can cause problems for some applications. iMovie, for example, does not start.
• For updated applications such as iLife, no problem: it will work.
• VMWare does not emulate a sound card for Mac OS X, so there is no sound in the virtual machine. The easiest solution is to dedicate USB speakers or a USB sound card to the virtual machine if it is really necessary.
• iWork ’09 does not work properly in the virtual machine, softwares will launch but it will be impossible to type anything.
• If Spotlight does not work, which happens sometimes, type the following line command .
mdutil sudo-i on / && sudo-E mdutil /
• One last tip: keep the modified boot image safe somewhere, it can be useful if you get in trouble.
I let you try…


Hey there! I just want to offer you a huge thumbs up for the excellent information you have
got here on this post. I will be returning to your site for more soon.